How to use Viidure

Viidure QR Code

Power on the dash cam and enable its Wi-Fi functionality.

Access the Settings menu, navigate to Wi-Fi/Wireless Network settings, and select the desired network.

Locate the SSID “JOOYFACT A10” in the list of available networks.Select the network by clicking on it.

Enter the password “12345678” in the authentication field.Tap the “Join” button to establish a connection between your smartphone and the dash cam.

If connection fails, verify the password matches the camera’s settings and restart both devices.

WLAN Menu
JOOYFACT A10 WIFI SSID
Wi-Fi password
WI-FI Connected

Your phone has successfully connected to the dash cam.

Network Connectivity Clarification

The dash cam’s Wi-Fi is exclusively designed for App connectivity and does not provide internet access—this is standard functionality.

  1. Android DevicesMost Android phones disable mobile data when connected to the camera’s Wi-Fi.                                                                                 Action: Disconnect from the camera’s Wi-Fi to restore cellular internet access.
  2. iOS Devices: iPhones allow simultaneous usage of Wi-Fi (for camera functions) and cellular data (for internet browsing).                                        Benefit: Maintain internet connectivity while operating the dash cam.                                                                                                                                       

Locate the Viidure app icon on your device’s home screen or app drawer. Tap the icon to launch the Viidure application.

ACCESS CAMERA
Album

Album Functionality & File Organization

This album categorizes downloaded files into three distinct types:

  1. Loop Files
    • Purpose: Stores video recordings for continuous overwrite (e.g., dash cam footage).
    • Behavior: Automatically replaces older files when storage reaches capacity.
  1. Image Files
    • Purpose: Archives static media (e.g., screenshots, photos).
    • Behavior: Retained indefinitely unless manually deleted.
  1. Emergency Files
    • Purpose: Secures critical recordings (e.g., collision evidence).
    • Behavior: Locked and protected from overwrite via G-sensor activation .

Select the More option to access and customize app settings.

more
APP SETTINGS

Language :Choose the language you want to use.

Language 1
Language 2
Language 3
Language 4

Date Format

Select a date format that suits your needs. This format works for the app but not for your dashcam.

Speed Unit

Configure the device’s speed unit to km/h (kilometers per hour) or mph (miles per hour) via the application interface.

Date format
Speed Unit

Video Player

When playback fails with a black screen or freezing (not network-related), try changing the video player, please.

Help

If you have more questions, access the Help section to find answers.

Video Player
Help

To use the dashcam, first tap the ‘Access Camera’ button on the main screen.

The A10 with GPS antenna is recording .

ACCESS CAMERA
GPS Version Recording

Recording via the A10 with GPS antenna has been manually halted.

Access Grid Menu via TF Card Icon.

Loop : Video files are captured normally .

Video Recording Pause
GRID

Snapshot : Display images that have been captured.

Locked : Emergency videos, lock emergency videos to block accidental deletion or overwriting.

Snapshot
LOCKED

Select videos to download or delete.

The video file is being downloaded. Current progress: 4%.

Select video
Downloading video

Video download paused. Resume to continue.

The GPS version of the video is recommended to be downloaded to your device for optimized replay performance.

Portrait mode playback

Downloading paused
Video replaying

Landscape mode playback

Video replay 2

Camera Settings

Camera settings
Camera Settings 2

Image Resolution , The resolution of captured snapshots/images can be configured via device settings.

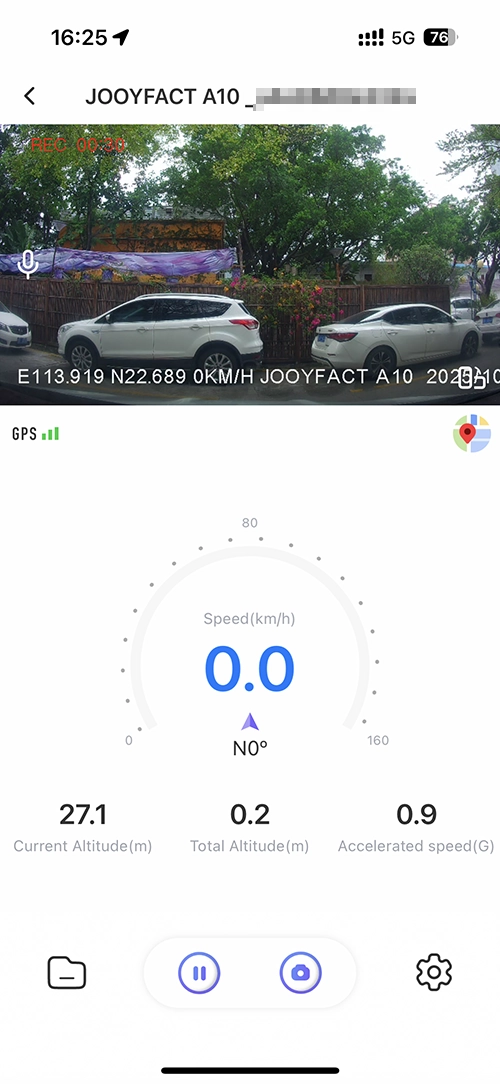
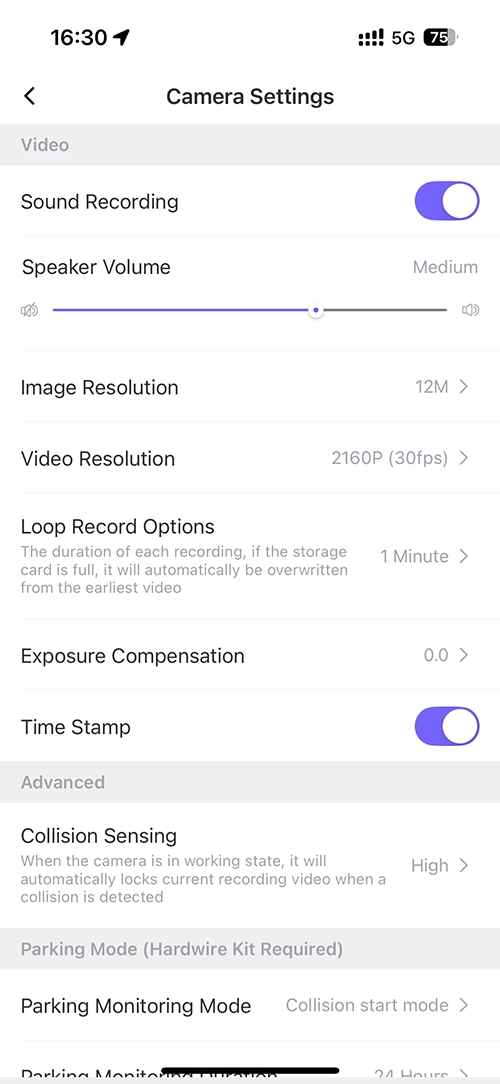
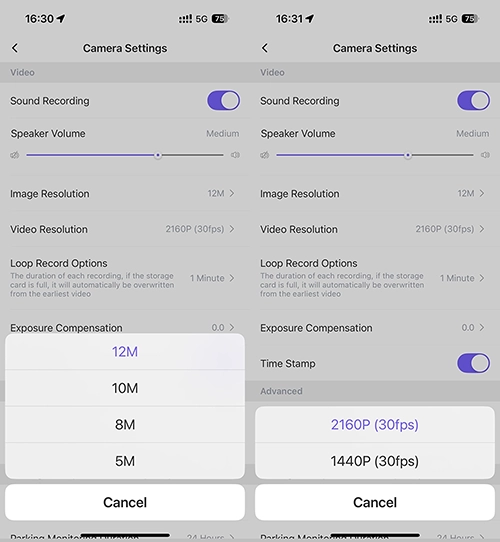
Video Resolution, that depend on the dash cam model and resolutions .

Image resolution
Video Resolution

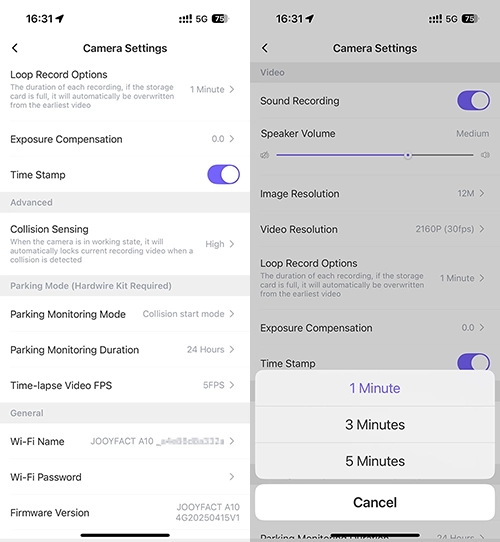
Loop Record Options : Configure the duration between 1–3 minutes for optimal performance.

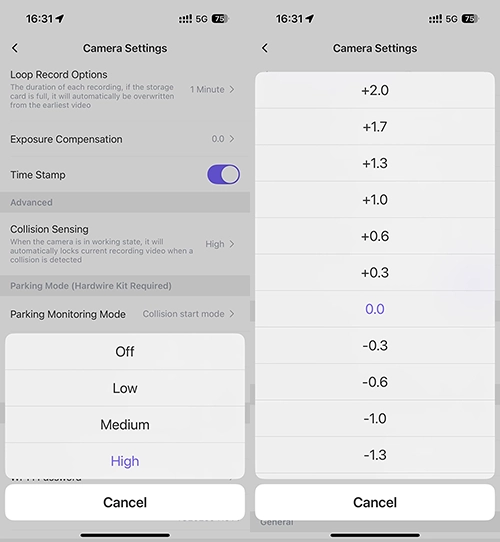
Exposure Compensation : Exposure Compensation enables users to add or subtract light from the camera’s automatically calculated exposure by adjusting the EV (Exposure Value) scale. This compensates for scenarios where the camera’s metering system misjudges lighting conditions, such as high-contrast scenes or subjects with extreme brightness/darkness.

Loop video options
Exposure Compensation

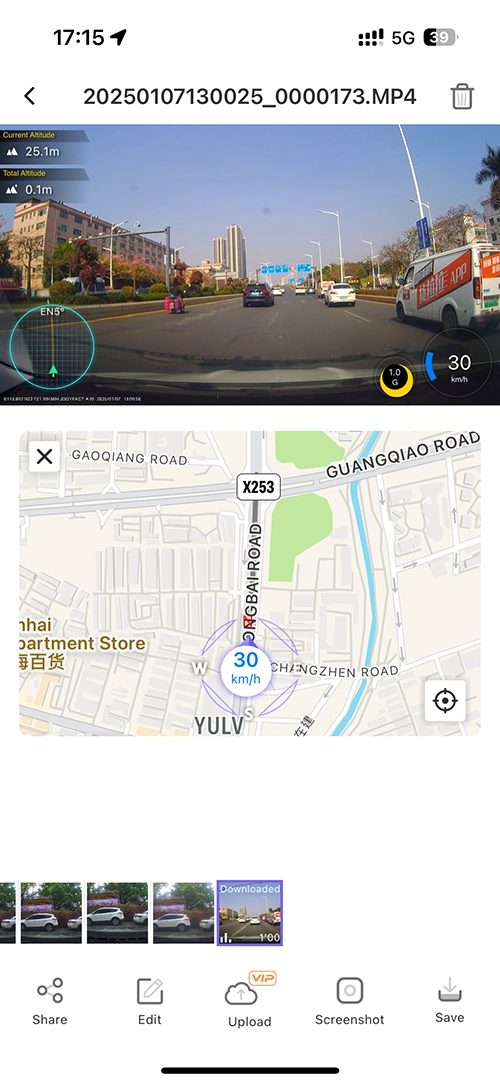
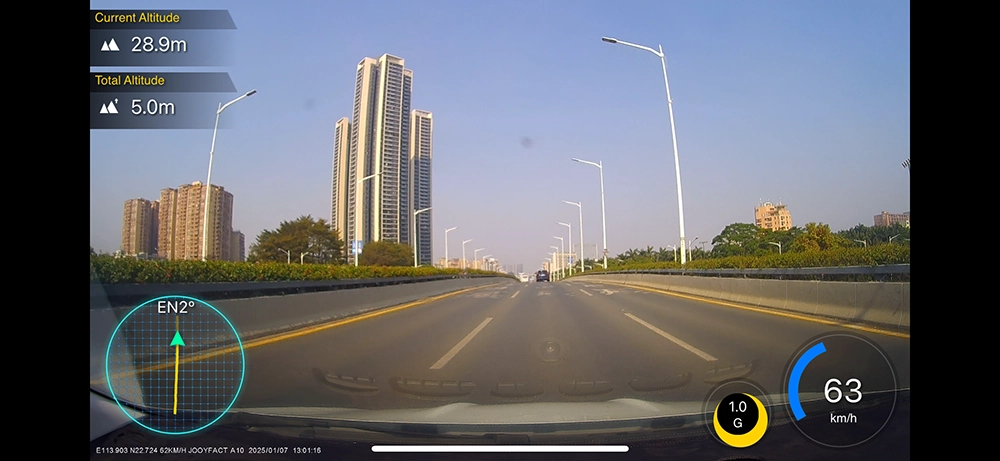
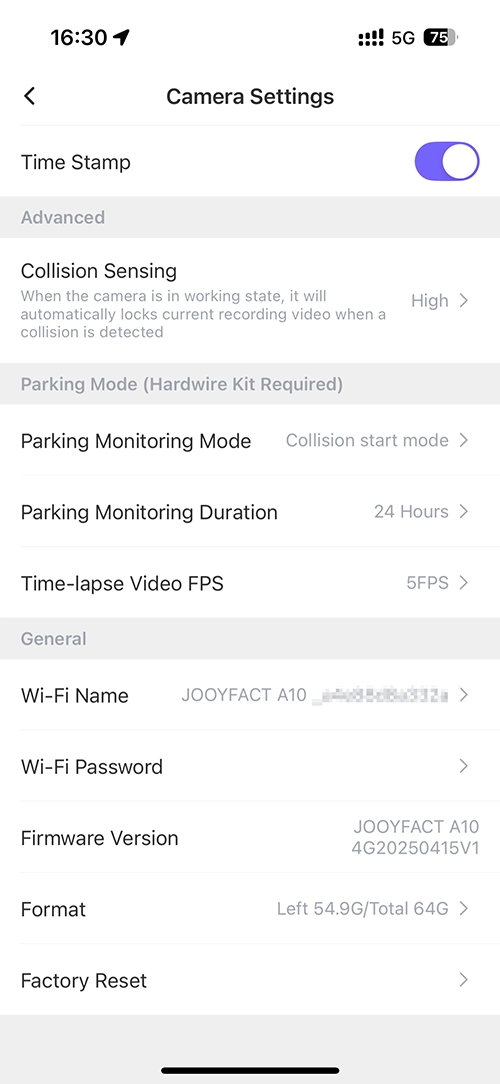
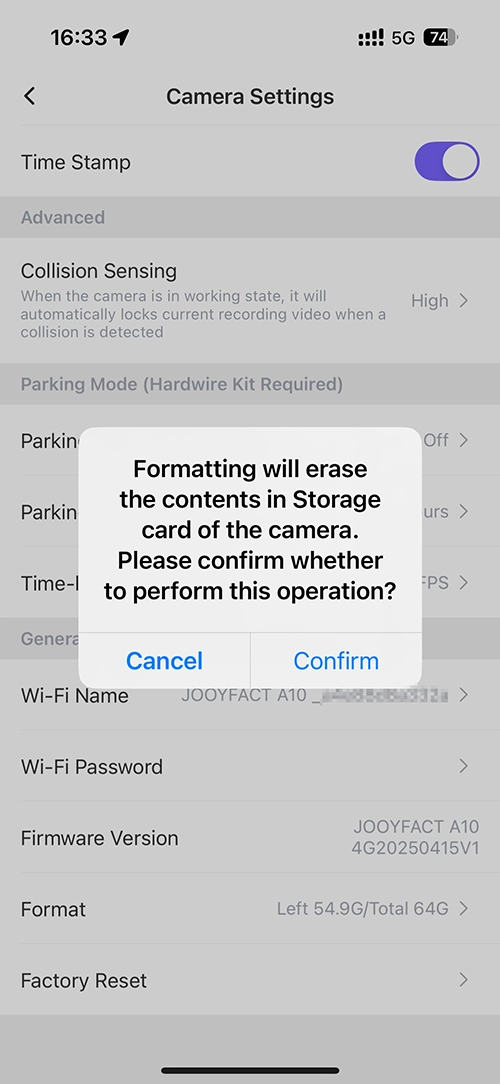
Time Stamp : Configure the video to add a timestamp watermark or keep it unwatermarked.

Collision Sensing :Adjust the G-sensor sensitivity (Off/Low/Medium/High) and test each setting to identify the optimal configuration for your usage scenario.

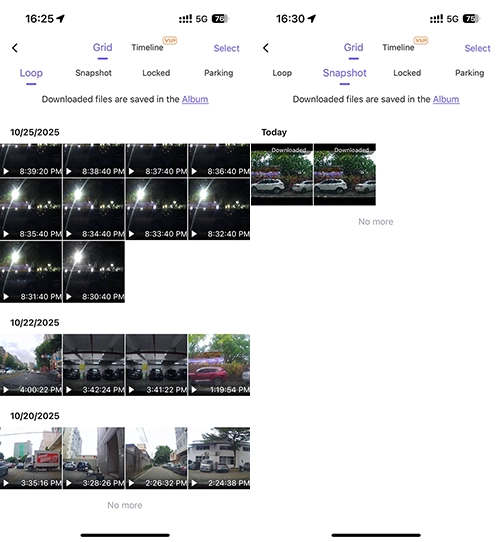
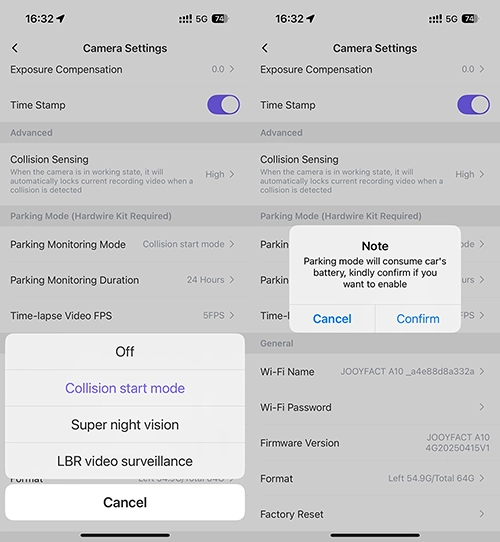
Parking Mode:The function utilizes the fuse box power cable by default, but compatible models (e.g., VW, Audi) can also connect via dedicated cables. It just can capture what had happened in the view of the dash cam .

Collision sensing
Parking Monitor

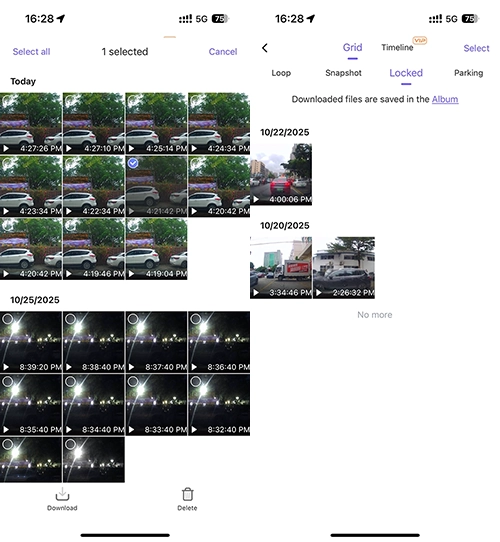
Collision start mode: The dashcam activates recording (30s/60s) when the G-sensor identifies a significant impact event, such as a collision or emergency braking.

Super Night vision:Improve the video quality at night.

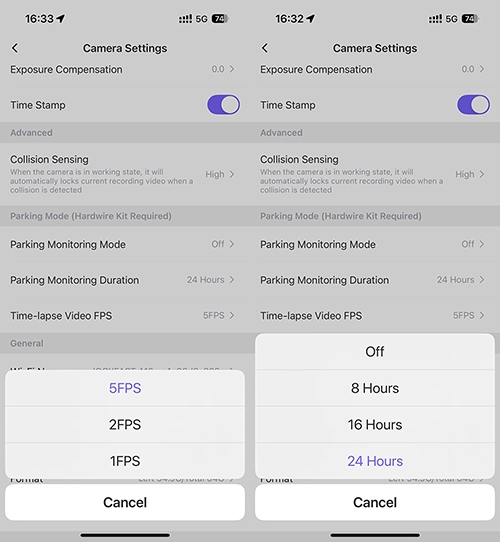
LBR video surveillance: Time lapse recording .You can set the duration and FPS .

Parking Monitor Model
Parking Monnitoring Duration

Wi-Fi Name: Do not use this function to change our dash cam Wi-Fi name, please .If you require a new network name for your dashcam, submit a support request via email with your device details.

Wi-Fi Password: Do not use this function to change our dash cam password, please .

If you require a new password for your dashcam, submit a support request via email with your device details.

WiFi name
WIFI Password

Format : Regularly formatting the memory card of the recorder can effectively prevent data loss. For normal use, the memory card should be formatted every 15-30 days.

Always back up important data before formatting, please.

Factory Reset

Click to Restore Factory Defaults.

Formatted
Scroll to Top